Proxy Setup in the ZennoPoster
May 9, 2024


What is ZennoPoster?
ZennoPoster is a powerful tool for automating various internet tasks. It offers a wide range of capabilities, allowing users to create and run automated scripts for performing routine web browser tasks.
Main features
ZennoPoster provides an intuitive visual interface for script creation without the need for programming knowledge. Users can easily create sequences of actions using a graphical interface. The tool supports working with multiple threads simultaneously, which helps increase productivity and task execution speed.
ZennoPoster integrates with the web browser and provides access to all its features, such as working with cookies, request headers, forms, and more. The tool allows you to create scripts that mimic user actions in the browser, such as keystrokes, mouse movements, and interactions with page elements.
It also supports working with various types of proxies and CAPTCHA recognition services, ensuring uninterrupted script operation even on complex websites.
Benefits
Main advantages of ZennoPoster:
- Helps automate many routine internet tasks such as filling out forms, data collection, web scraping, and more, saving time and resources.
- Performs a wide range of tasks in SEO and internet marketing, such as creating and launching advertising campaigns, collecting keywords, analyzing competitors, etc.
- Used for automating web application testing, allowing the identification and correction of errors and deficiencies in application operation.
- Used for data collection, content analysis, and internet analytics, which assists in making informed decisions and formulating strategies.
How to Set Up a Proxy
First, download your proxy in a txt format from your personal account. To do this, simply select the necessary proxies, click "Download" and choose "Download (.txt)".

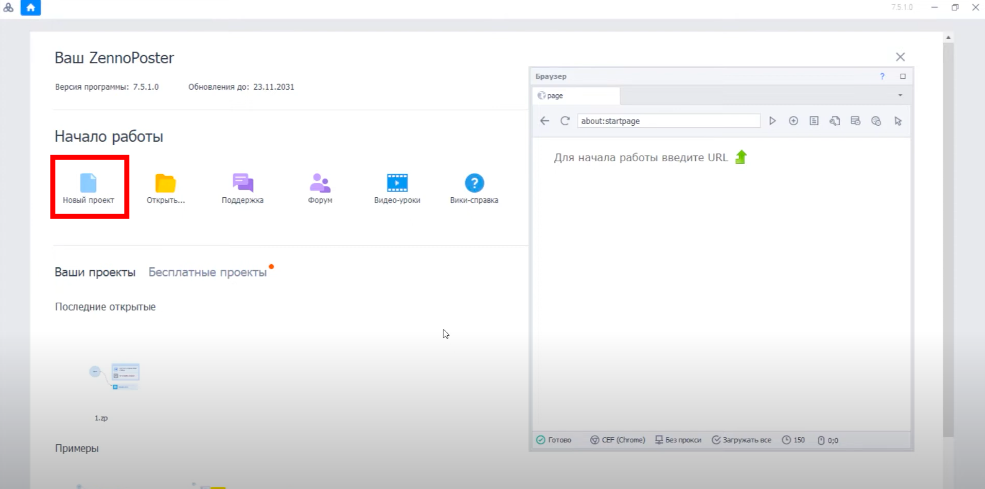
Then open ZennoPoster and create a new project and save it on your computer.
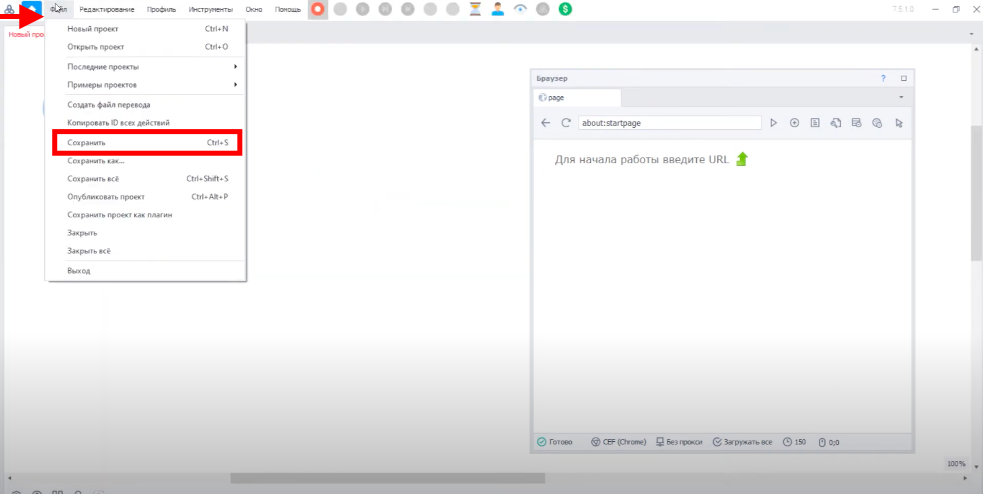
To save the project, select "File" - "Save" and specify the location on your computer where the project will be stored.
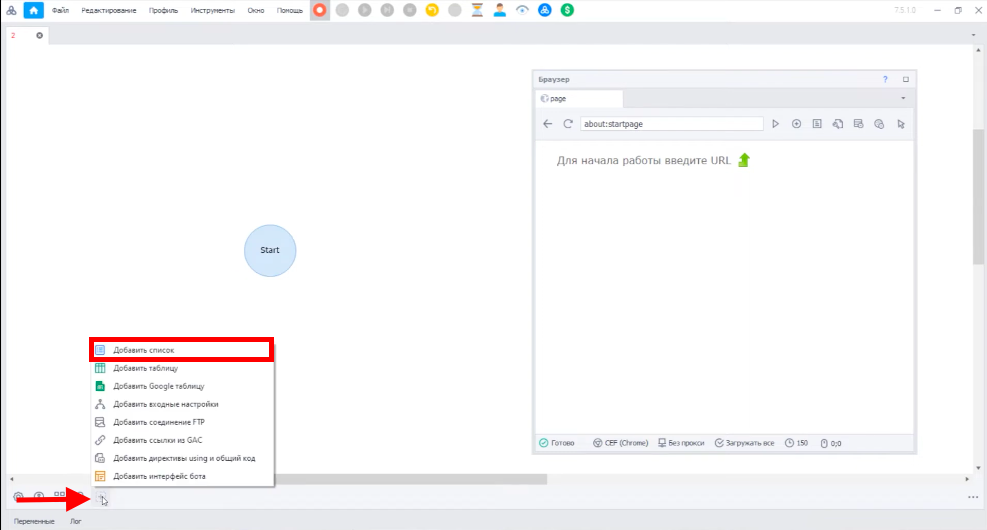
Next, add the proxy list. Click the plus at the bottom of the screen and then select "Add list".
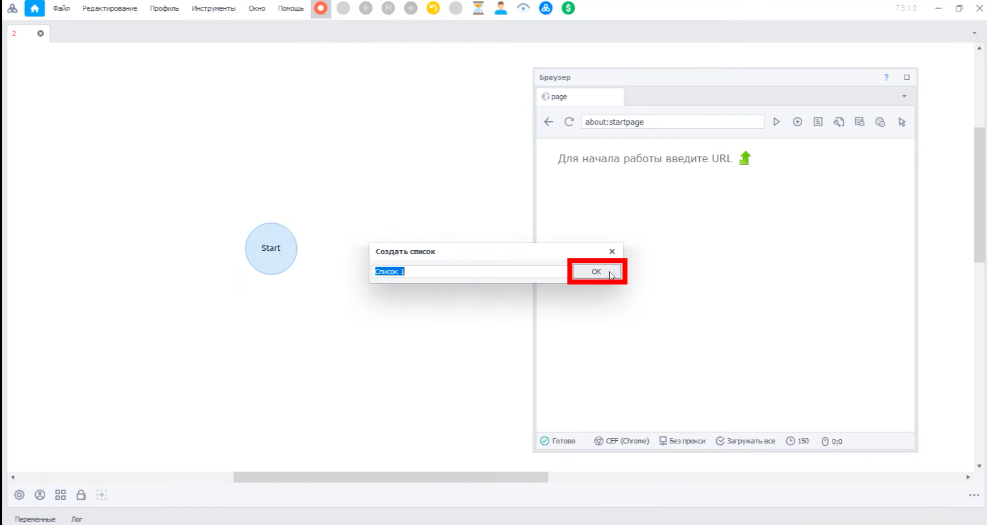
Name the list as needed and click "OK" to save the list.
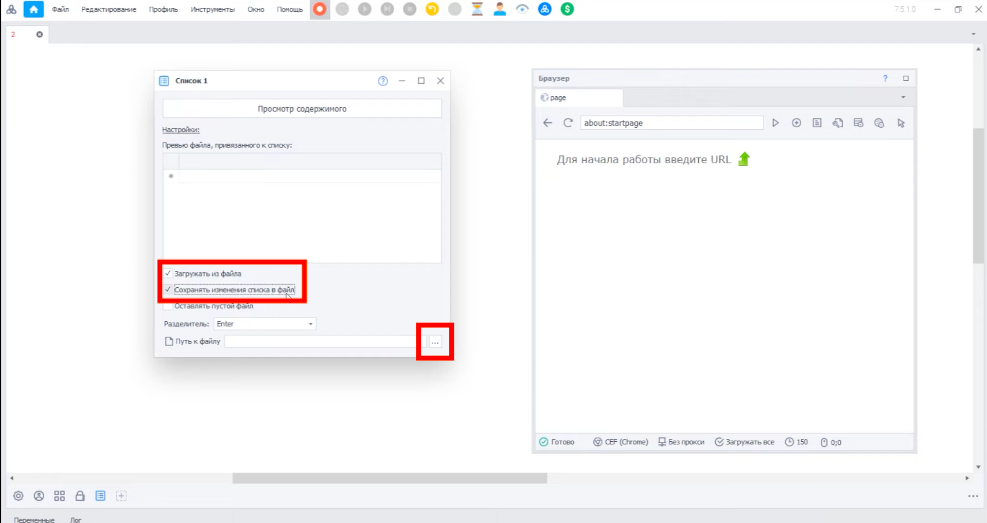
In the appearing window, check the boxes for "Load from file" and "Save list changes to file", then click on the three dots and select your previously downloaded proxy list in txt format.
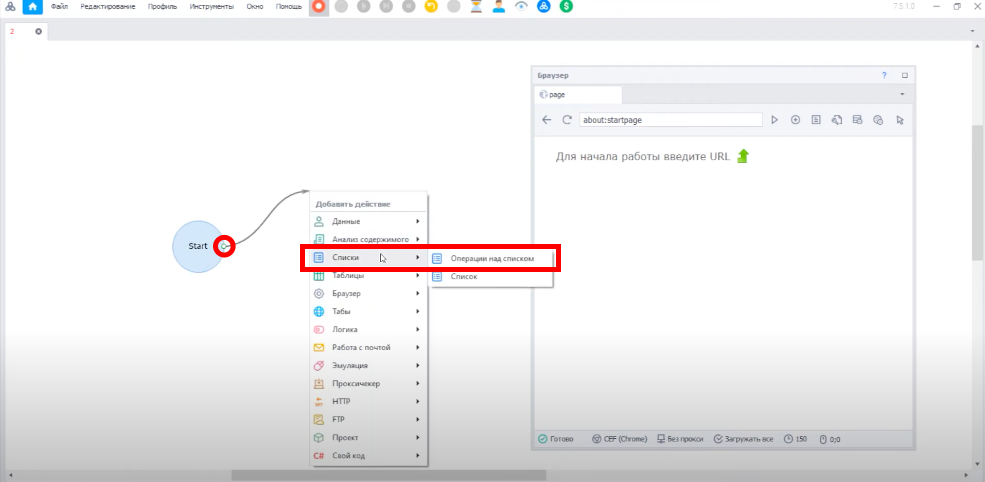
In the workspace, drag the arrow from Start to the right to open the menu. In it, choose "Lists" - "List Operations".
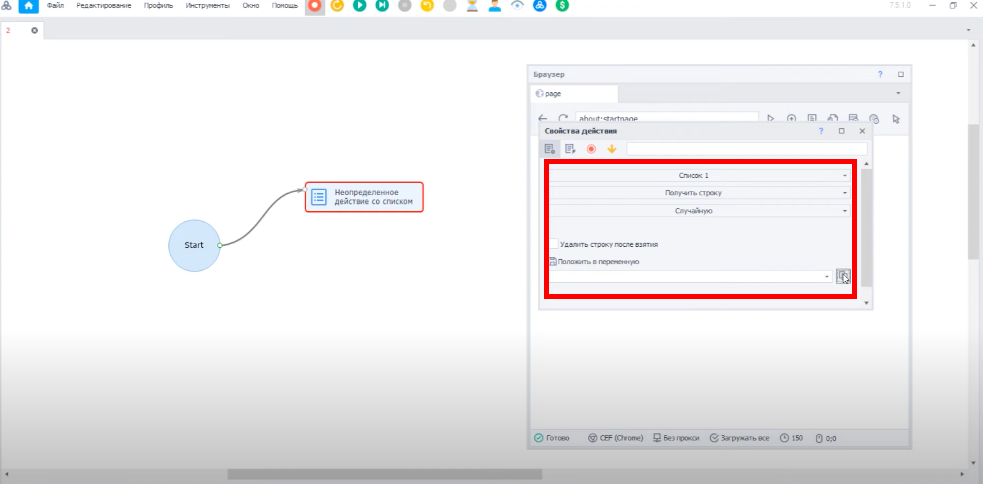
Double-click the action that appears. In the window on the right, select your proxy list. Obtain the list.
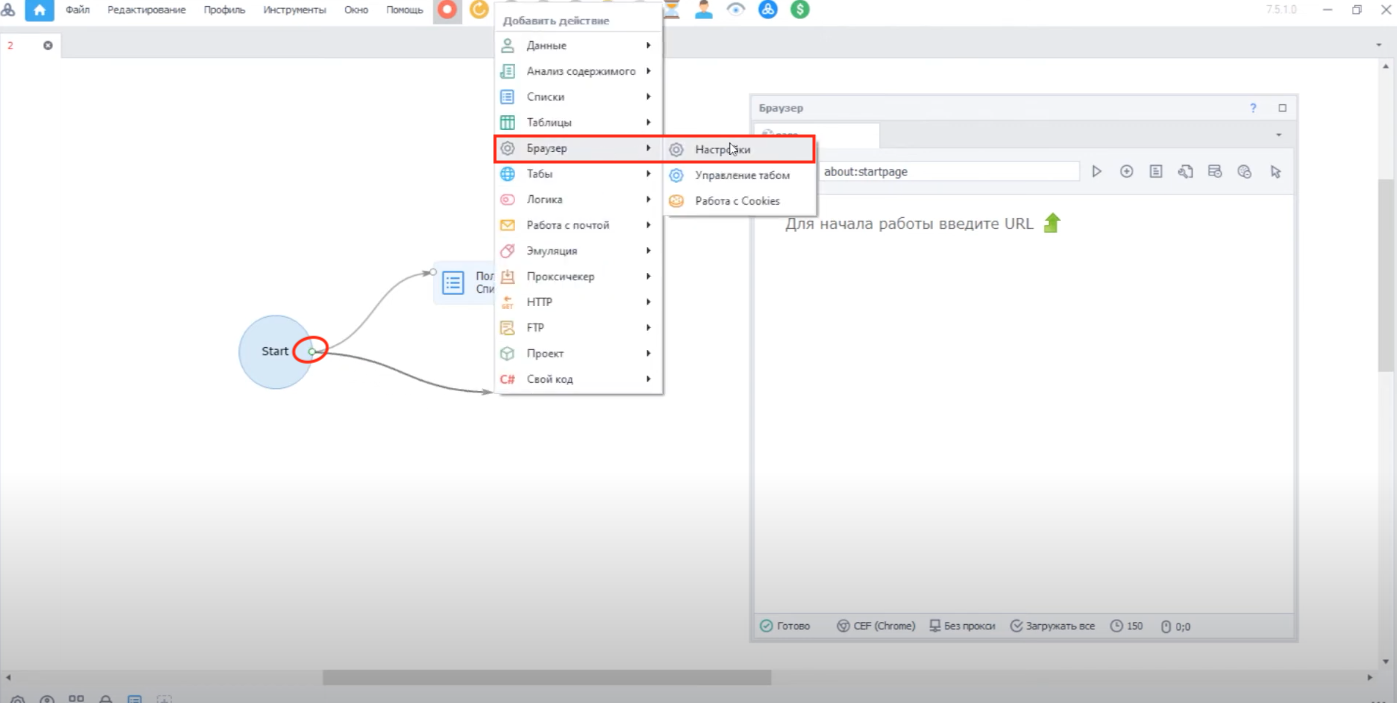
Similarly, in the workspace, drag the arrow from Start to the right to open the menu. Choose "Browser" - "Settings".
In the "Select action" field, scroll down and select "Set Proxy".
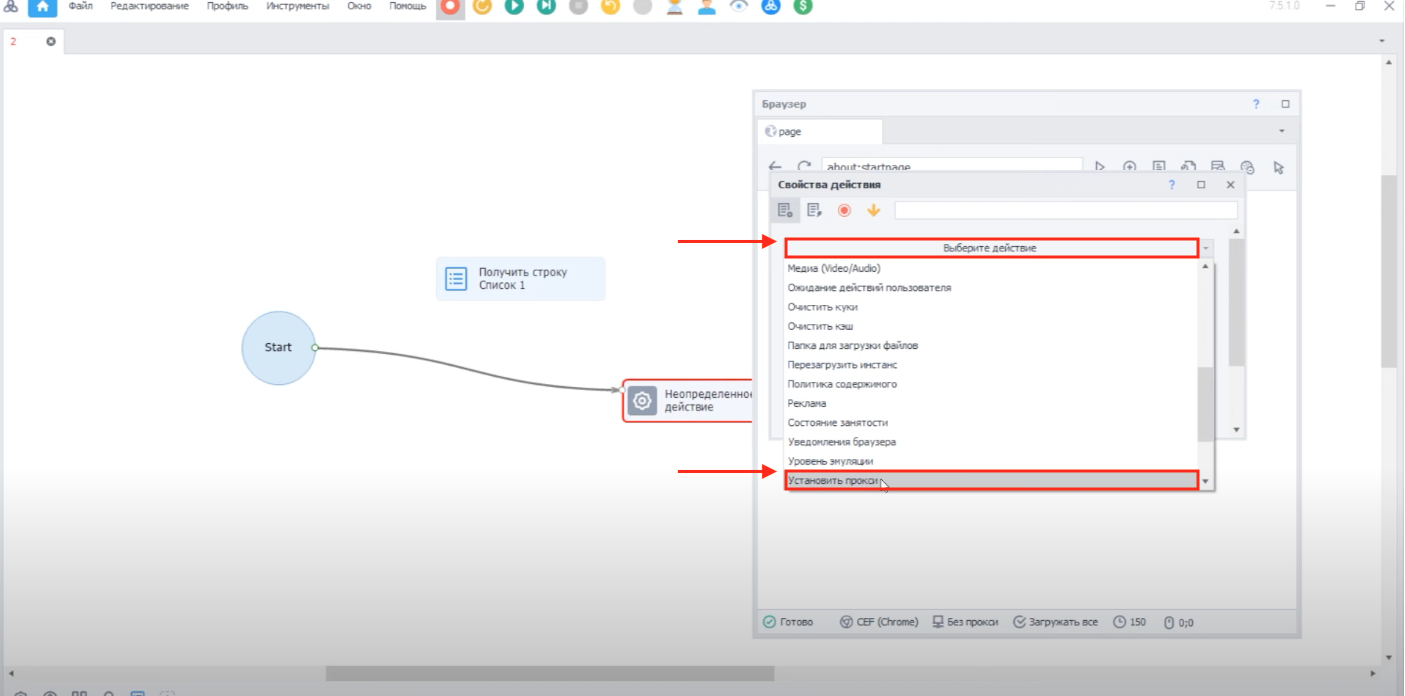
Then click with the left mouse button and choose "Set Variable Value" - Proxy, then close this window.
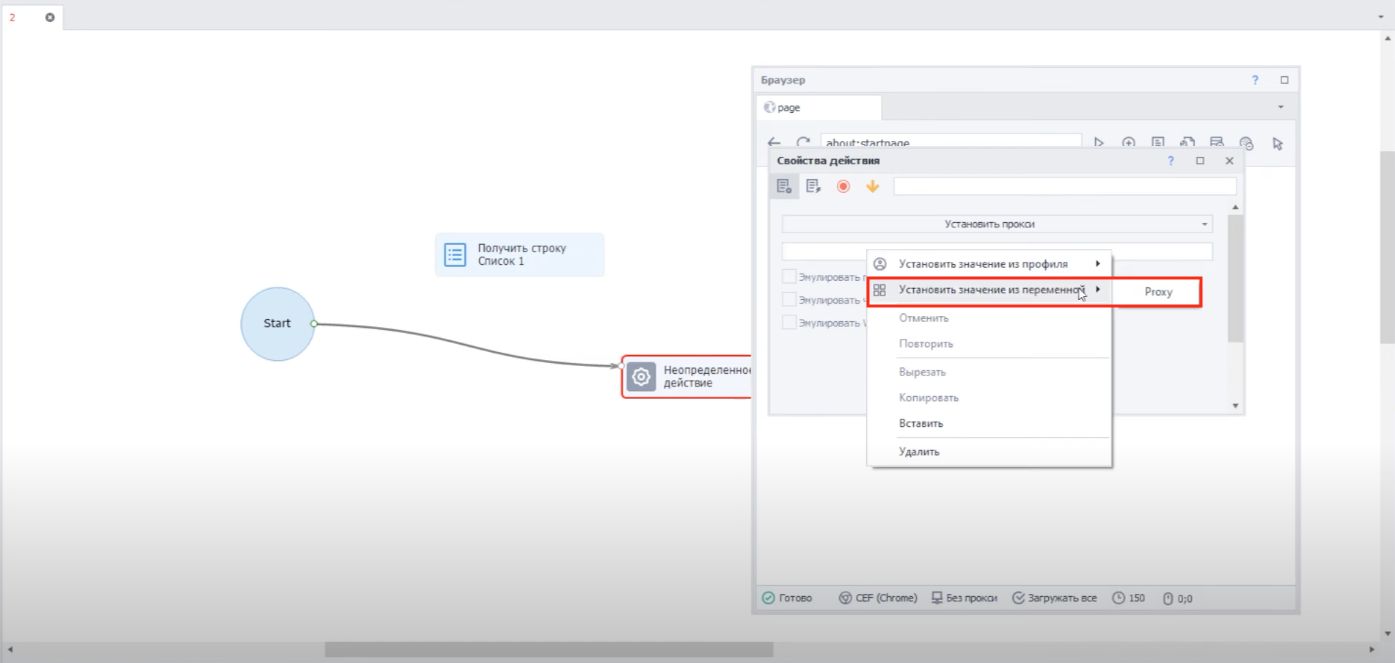
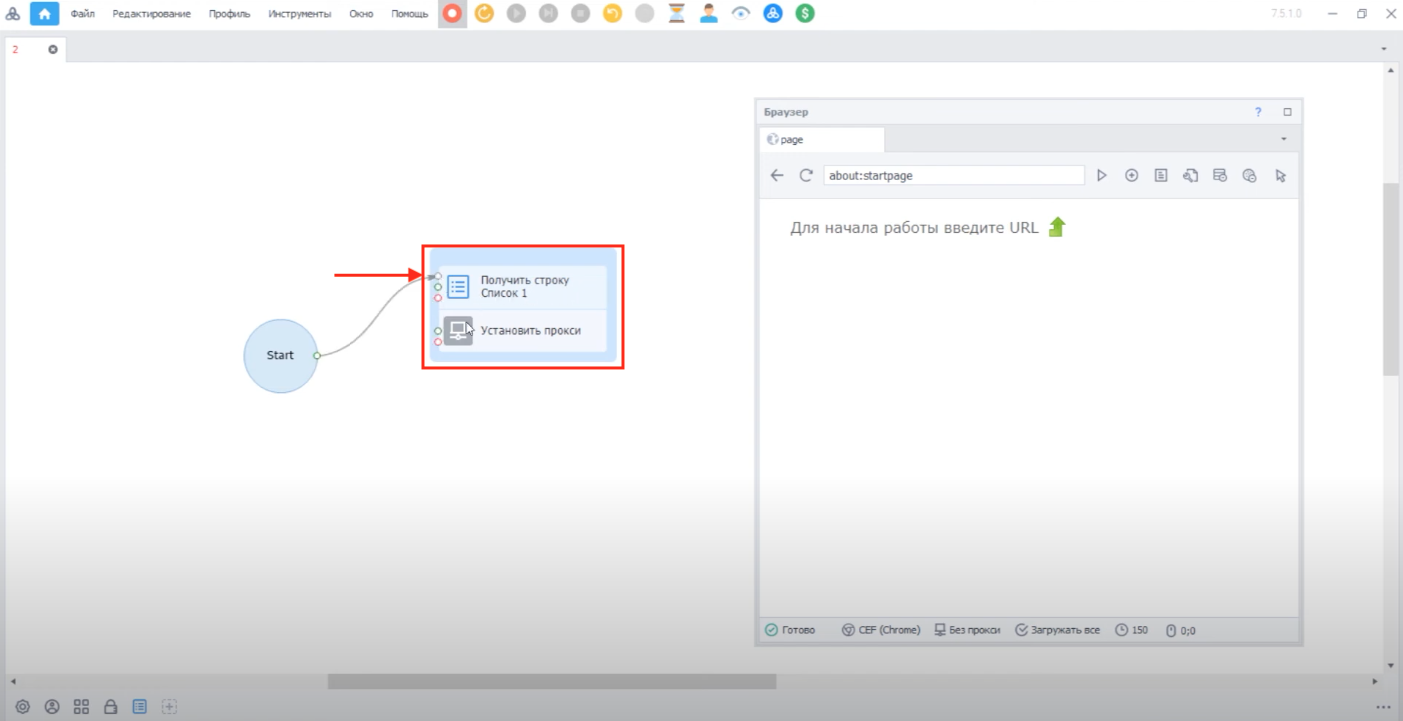
Then drag the "Undefined action" field to "Get string" to link them. Then from the Start button, drag the arrow to the "Get string" field as shown in the screenshot. After this, the proxy setup will be completed.
To check that the proxy is working, drag another arrow from Start and choose "Tabs" - "Navigate to Page"
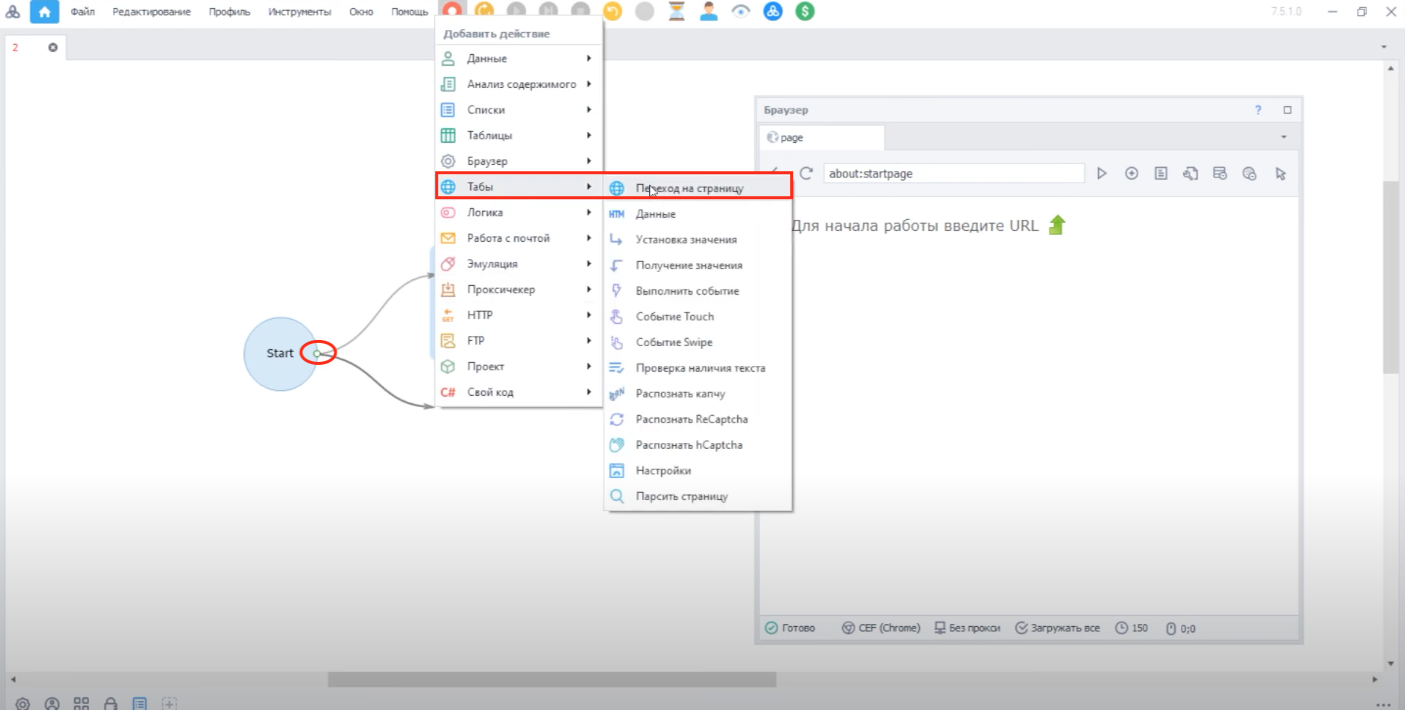
After the window appears, click on it twice, and the Action Properties window will open. Here, enter any site you want in the URL field and then simply close this window.
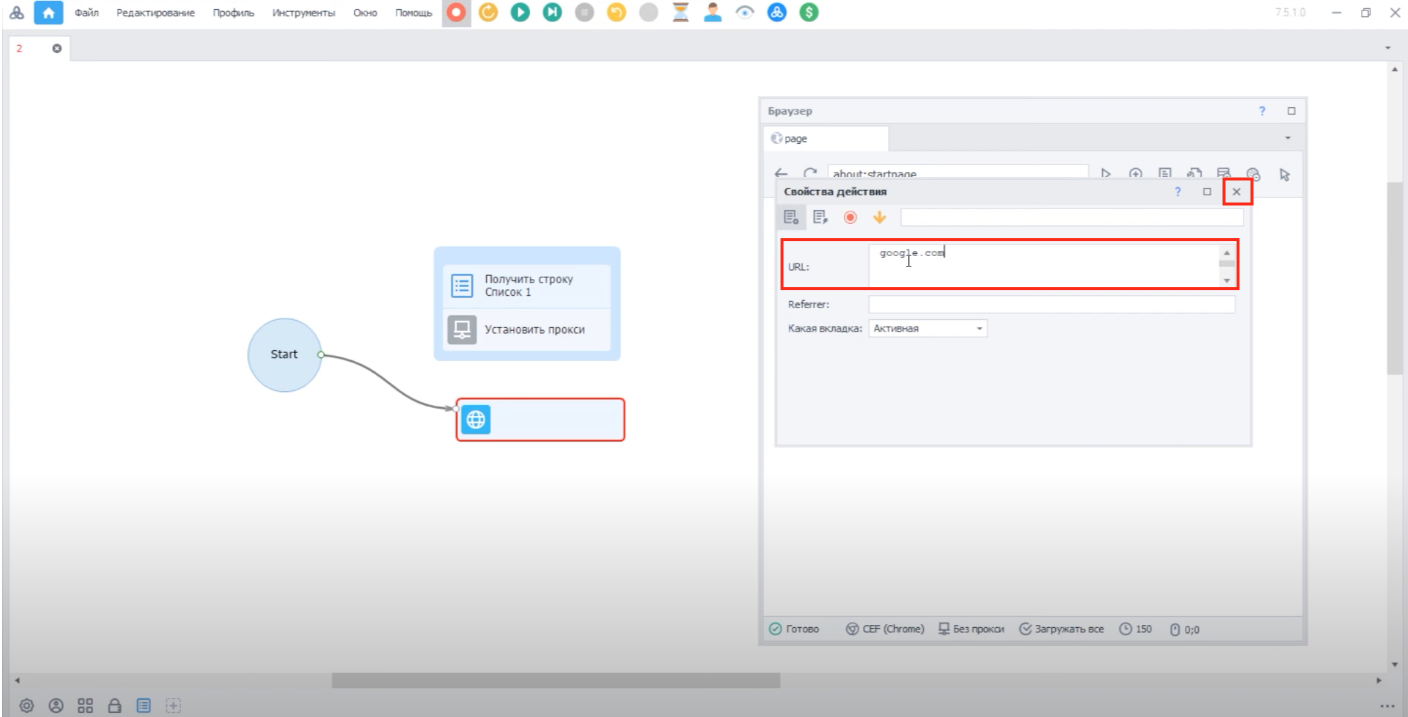
At this stage, drag the field with your site to the previously linked fields. Then from the Start button, drag the arrow to the "Get string" field as shown in the screenshot and start the project (the Next button at the top of the screen).
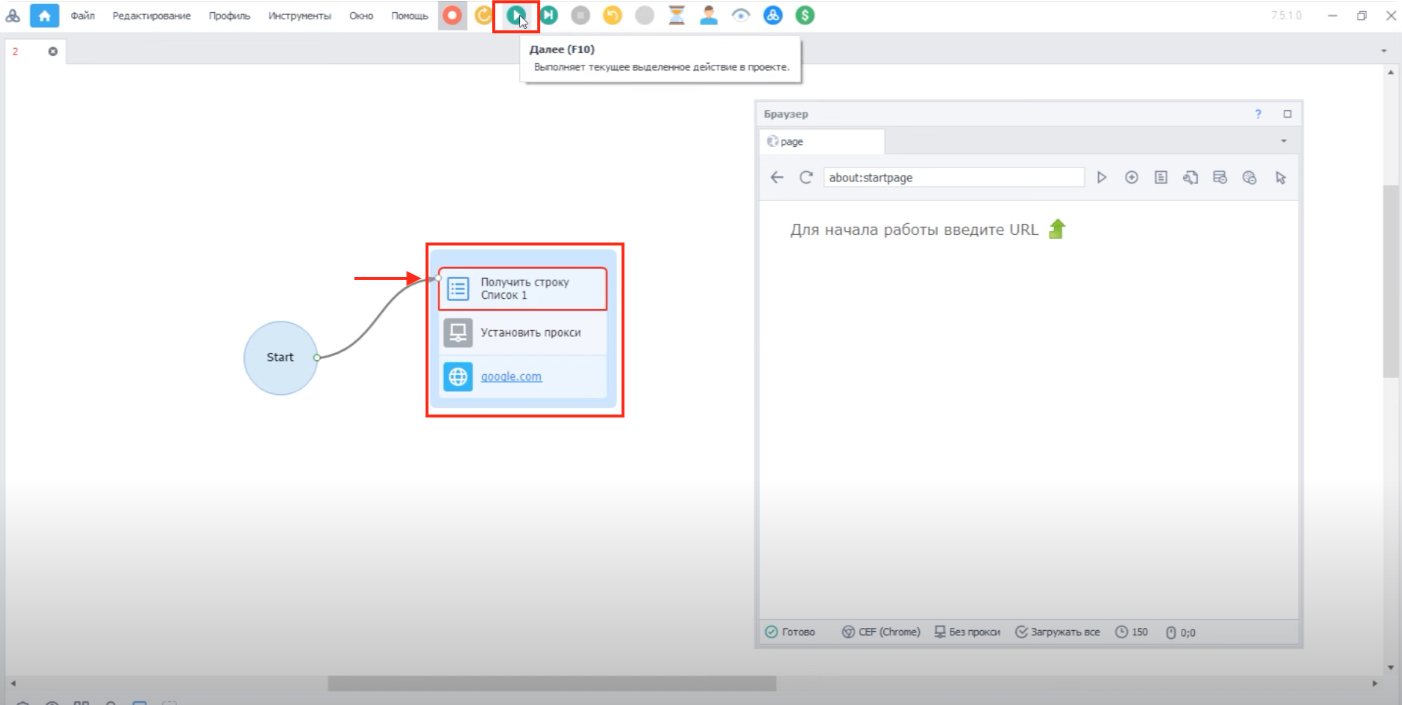
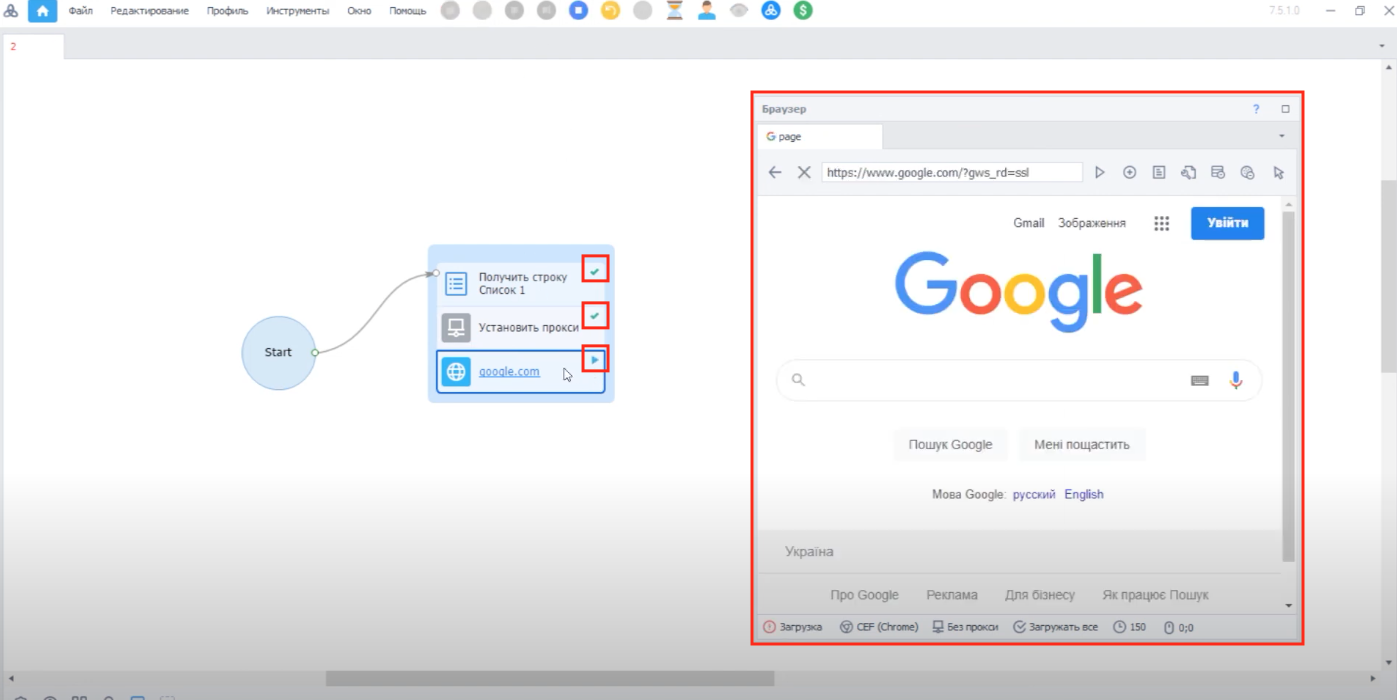
You will need to press the button three times. If everything is set up correctly and the proxy is working - check marks will appear next to the fields, and a browser will open on the right with the site you entered.
Thanks to its wide range of capabilities and easy-to-use interface, ZennoPoster becomes an indispensable assistant for specialists in internet marketing, SEO, testing, and analytics.